HTTP-access logs with logback-access, Jetty and Tomcat
Introduction
The logback-access module, part of the standard logback distribution, integrates with Servlet containers such as Jetty or Tomcat to provide rich and powerful HTTP-access log functionality.
Logback was designed as a modular framework from the start. Making logback-core reusable under different circumstances without much recoding was one of our main goals. In accordance with this strategy, logback-access builds on top of logback-core and can thus provide much of the functionality of logback-classic but in the scope of HTTP-access logging.
It should be noted that while logback-access requires logback-core, it is independent of logback-classic as well as slf4j. Just as importantly, logback-access artifact must be installed at the container level, not at web-application level. It does not make sense to bundle logback-access.jar at the level of a web-application.
Logback-access under Tomcat
To use logback-access with Tomcat, after downloading the logback distribution, place the files logback-core-1.1.3.jar and logback-access-1.1.3.jar under $TOMCAT_HOME/lib/ directory, where $TOMCAT_HOME is the folder where you have installed Tomcat.
Deploying recent versions of logback-access on Tomcat 6.x (instead of Tomcat 7.x) is likely to cause the server to crash.
Tomcat 7.x This version of logback-access has been tested with Tomcat version 7.0.21. It will not work with Tomcat 6.x.
Tomcat 6.x Logback-access version 0.9.30 will deploy on Tomcat 6.x.
LogbackValve
The
ch.qos.logback.access.tomcat.LogbackValve class
extends Tomcat's
ValveBase class. Valves are usually associated together
to form a processing pipeline.
To configure Tomcat in order to use LogbackValve,
add the following lines to the tomcat server configuration file,
namely $TOMCAT_HOME/conf/server.xml:
<Valve className="ch.qos.logback.access.tomcat.LogbackValve"/>
This line is usually nested within an <Engine>
or <Host> element.
By default, LogbackValve looks for a configuration
file called logback-access.xml, in the same folder where
server.xml is located, that is in
$TOMCAT_HOME/conf/. This configuration file contains
directives for configuring logback-access components. It is used
to specify appenders where the logging requests will be
sent. Please refer to the logback-access
configuration section further below.
In order to help with troubleshooting, by default, the
LogbackValve will print its internal status at its
initialization. Typical output would look as:
21:56:09,921 |-INFO in c.q.lb.access.j.a.ConfigurationAction - Ignoring debug attribute. 21:56:09,921 |-INFO in c.q.lb.core.j.a.AppenderAction - About to instantiate appender of type [ch.qos.logback.core.ConsoleAppender] 21:56:09,921 |-INFO in c.q.lb.core.j.a.AppenderAction - Naming appender as [STDOUT] 21:56:10,015 |-INFO in c.q.lb.core.j.a.AppenderAction - Popping appender named [STDOUT] from the object stack 21:56:10,015 |-INFO in c.q.lb.core.j.a.AppenderRefAction - Attaching appender named [STDOUT] to ch.qos.logback.access.tomcat.LogbackValve[Catalina] 21:56:10,015 |-INFO in c.q.lb.access.j.a.ConfigurationAction - End of configuration.
It is possible to override default status printing by specifying
the "quiet" attribute in the Valve
element. Similarly, it is also possible to set the filename for
the logback-access configuration file. Here is an example.
<Valve className="ch.qos.logback.access.tomcat.LogbackValve"
       quiet="true" filename="c:/my-logback-access.xml"/>
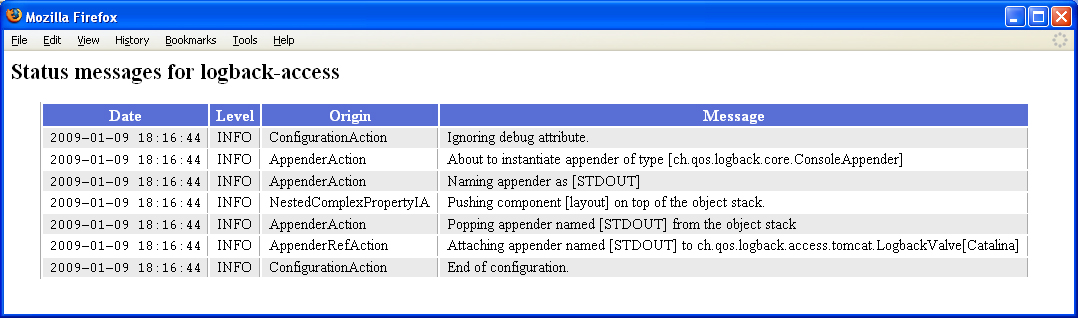
Viewing status messages
Logback-access ships with a servlet called
ViewStatusMessagesServlet. This servlet prints the
internal status messages of the LogbackValve as an
HTML table. Here is sample output.
To add this servlet to your web-application, add the following lines to its WEB-INF/web.xml file.
  <servlet>
    <servlet-name>AccessViewStatusMessages</servlet-name>
    <servlet-class>ch.qos.logback.access.ViewStatusMessagesServlet</servlet-class>
  </servlet>

  <servlet-mapping>
    <servlet-name>AccessViewStatusMessages</servlet-name>
    <url-pattern>/lbAccessStatus</url-pattern>
  </servlet-mapping>
The ViewStatusMessages servlet will available
under the URL http://host/yourWebapp/lbAccessStatus
Logback-access under Jetty
After downloading the logback distribution, place the files logback-core-VERSION.jar and logback-access-VERSION.jar under $JETTY_HOME/lib directory, where $JETTY_HOME is the folder where you have installed Jetty. Versions of logback-access 0.9.31 and later target Jetty versions 7.x and 8.x. Logback-access versions 0.9.30 and earlier target Jetty version 6.x.
Logback's implementation of
org.eclipse.jetty.server.RequestLog interface
The
ch.qos.logback.access.jetty.RequestLogImpl class
implements Jetty's RequestLog
interface. Jetty delegates the management of access logging
functionality to implementations of this interface.
In logback, a logging destination is called an "appender" which
can be directly attached to a
ch.qos.logback.access.jetty.RequestLogImpl instance.
In order to configure Jetty to use logback-access's
RequestLogImpl, please add the following lines to
Jetty's main configuration file, namely
$JETTY_HOME/etc/jetty.xml:
<Ref id="RequestLogHandler">
  <Set name="requestLog">
    <New id="requestLogImpl" class="ch.qos.logback.access.jetty.RequestLogImpl">
    </New>
  </Set>
</Ref>
Please note that the above jetty configuration snippet makes
reference to "RequestLogHandler". Check your jetty.xml
configuration file and add a RequestLogHandler if it
has not been already added. Here is a configuration snipped to set
you on the right tract.
<Set name="handler">
  <New id="Handlers" class="org.eclipse.jetty.server.handler.HandlerCollection">
    <Set name="handlers">
      <Array type="org.eclipse.jetty.server.Handler">
        <Item>
          <New id="Contexts"
               class="org.eclipse.jetty.server.handler.ContextHandlerCollection"/>
        </Item>
        <Item>
          <New id="DefaultHandler"
               class="org.eclipse.jetty.server.handler.DefaultHandler"/>
        </Item>
        <!-- add a RequestLogHandler -->
        <Item>
          <New id="RequestLogHandler"
               class="org.eclipse.jetty.server.handler.RequestLogHandler"/>
        </Item>
      </Array>
    </Set>
  </New>
</Set>
By default, RequestLogImpl looks
for a logback configuration file called
logback-access.xml, in the same folder where
jetty.xml is located. This configuration file contains
directives for configuring logback components such as appenders
and layouts.
As long the path is specified, you can place the logback configuration file in any location. Here is another example of a Jetty configuration file, including the path to the logback-access configuration file here named myaccess.xml.
<Ref id="RequestLogHandler">
  <Set name="requestLog">
    <New id="requestLogImpl" class="ch.qos.logback.access.jetty.RequestLogImpl">
       <Set name="fileName">path/to/myaccess.xml</Set>
    </New>
  </Set>
</Ref>
For embedded Jetty, it is helpful to lookup for the logback-access configuration file as a class path resource. This can be accomplished by setting the resource property to the file name to look up on the class path.
<Ref id="RequestLogHandler">
  <Set name="requestLog">
    <New id="requestLogImpl" class="ch.qos.logback.access.jetty.RequestLogImpl">
       <Set name="resource">as/classpath/resource/myaccess.xml</Set>
    </New>
  </Set>
</Ref>
Logback-access configuration
Although similar, the format of logback-access.xml configuration file is slightly different than the configuration file format logback-classic. Appenders and Layouts are declared the exact same way. However, in the access module there is no notion of loggers and consequently logger elements are disallowed.
Example 1: basic logback-access configuration
Here is a small but fully functional logback-access.xml configuration file:
<configuration>
  <!-- always a good activate OnConsoleStatusListener -->
  <statusListener class="ch.qos.logback.core.status.OnConsoleStatusListener" />

  <appender name="STDOUT" class="ch.qos.logback.core.ConsoleAppender">
    <encoder>
      <pattern>%h %l %u %user %date "%r" %s %b</pattern>
    </encoder>
  </appender>

  <appender-ref ref="STDOUT" />
</configuration>
It declares a ConsoleAppender which prints its output
on the console. The ConsoleAppender contains an
Encoder object responsible for formatting output. The
log format is specified by the "%h %l %u %user %date "%r" %s %b"
pattern which incidentally corresponds to the Common Log Format
(CLF). This format is recognized by log analyzers such as Analog or AWStats.
The words "common" or "clf" are interpreted as shorthands for the said pattern. Thus, the following are all equivalent:
<pattern>%h %l %u %user %date "%r" %s %b</pattern>
<pattern>common</pattern>
<pattern>clf</pattern>
The so called "combined" format is also widely recognized. It is defined as the '%h %l %u [%t] "%r" %s %b "%i{Referer}" "%i{User-Agent}"' pattern. As a facilitator, you can use the "combined" as a shorthand. Thus, the following directive
<encoder>
  <pattern>%h %l %u [%t] "%r" %s %b "%i{Referer}" "%i{User-Agent}"</pattern>
</encoder>
is equivalent to:
<encoder>
  <pattern>combined</pattern>
</encoder>
Example 2: RollingFileAppender
The configuration file below configures a daily rolling
RollingFileAppender. Note that due to the
.zip suffix included in the value for fileNamePattern option, the log files are not
only rolled daily, but they are also automatically compressed.
<configuration>
  <!-- always a good activate OnConsoleStatusListener -->
  <statusListener class="ch.qos.logback.core.status.OnConsoleStatusListener" />

  <appender name="FILE" class="ch.qos.logback.core.rolling.RollingFileAppender">
    <file>access.log</file>
    <rollingPolicy class="ch.qos.logback.core.rolling.TimeBasedRollingPolicy">
      <fileNamePattern>access.%d{yyyy-MM-dd}.log.zip</fileNamePattern>
    </rollingPolicy>

    <encoder>
      <pattern>combined</pattern>
    </encoder>
  </appender>

  <appender-ref ref="FILE" />
</configuration>
These two examples should give you an idea of the possibilities offered by logback-access. In principle, most if not all of the features available in logback-classic are also available in logback-access.
PatternLayout
Logback-access ships with an http-specific implementation of
PatternLayout. For detailed instructions on how
to use the PatternLayout, please refer to the corresponding
chapter of the logback manual.
JMX Components
Logback-access integrates with JMX servers to publish information about its components.
Both RequestLogImpl and LogbackValve
expose data and can be updated via JMX. A special filter, covered
further down this document, publishes statistical data on access
logs.
Configuring Tomcat for JMX
In order to configure Tomcat for JMX, please add the following lines to the $TOMCAT_HOME/bin/catalina.sh shell script (or its MS Windows equivalent):
CATALINA_OPTS="-Dcom.sun.management.jmxremote"
CATALINA_OPTS="$CATALINA_OPTS -Dcom.sun.management.jmxremote.ssl=false"
CATALINA_OPTS="$CATALINA_OPTS -Dcom.sun.management.jmxremote.authenticate=false"
After you launch Tomcat, you can access the MBeans exposed by Tomcat via the JConsole application, which can be started with the following command:
jconsole
If you prefer MX4J to access your components via a web-based interface, here is a short summary of the steps to follow. After downloading MX4J, place the mx4j-impl.jar file in the $TOMCAT_HOME/bin/ directory, and the mx4j-tools.jar file in the $TOMCAT_HOME/common/lib/ directory. Once that is done, add the following lines to the $TOMCAT_HOME/bin/catalina.sh shell script:
<!-- at the beginning of the file -->
CATALINA_OPTS="-Dcom.sun.management.jmxremote"
CATALINA_OPTS="$CATALINA_OPTS -Djavax.management.builder.initial=mx4j.server.MX4JMBeanServerBuilder"

<!-- in the "Add on extra jar files to CLASSPATH" section -->
CLASSPATH="$CLASSPATH":"$CATALINA_HOME"/bin/mx4j-impl.jar
Finally, declare a new Connector in the
$TOMCAT_HOME/conf/server.xml file:
<Connector port="8050"
  handler.list="mx"
  mx.enabled="true"
  mx.httpHost="localhost"
  mx.httpPort="8082"
  protocol="AJP/1.3" />
Once Tomcat is started, you should be able to reach your JMX components by pointing your browser at the following URL:
http://localhost:8082/
Configuring Jetty
Configuring Jetty to publish JMX components requires a few modifications to the $JETTY_HOME/etc/jetty.xml configuration file. Here are the elements that need to be added:
<Call id="MBeanServer" class="java.lang.management.ManagementFactory" name="getPlatformMBeanServer"/>
<!-- initialize the Jetty MBean container -->
<Get id="Container" name="container">
  <Call name="addEventListener">
    <Arg>
      <New class="org.mortbay.management.MBeanContainer">
        <Arg><Ref id="MBeanServer"/></Arg>
        <Set name="managementPort">8082</Set>
        <Call name="start" />
      </New>
    </Arg>
  </Call>
</Get>
Once Jetty is started with this configuration, all available components can be reviewed at:
http://localhost:8082/
Logback-access' RequestLogImpl should be
available, including its start() and
stop() methods.
TeeFilter (a servlet-filter)
In order to diagnose bugs in a web-application, it is often
handy to capture the client's request as well as the server's
response. The TeeFilter was designed precisely for
this purpose. It should be noted that TeeFilter is a
regular servlet
filter. Like other servlet filters, it needs to be declared in
your web-application's web.xml file:
<filter>
  <filter-name>TeeFilter</filter-name>
  <filter-class>ch.qos.logback.access.servlet.TeeFilter</filter-class>
</filter>

<filter-mapping>
  <filter-name>TeeFilter</filter-name>
  <url-pattern>/*</url-pattern>
</filter-mapping>
We have tested TeeFilter to the best of our
ability. However, since it duplicates the input stream of the
request and the output stream of the response, it may interfere with
your application. Moreover, for large input or output sizes, it will
add measurable latency. Although we have already fixed all currently
known bugs, TeeFilter has broken otherwise correctly
behaving applications in the past. Thus, in case of doubt, do not
hesitate to disable TeeFilter.
Once TeeFilter is installed, the PatternLayout
converters fullRequest and fullResponse
will output the full contents of the request and respectively the
response.
Here is a sample logback-access.xml configuration file which will output the full contents of the request and response on the console.
<configuration>
  <appender name="STDOUT" class="ch.qos.logback.core.ConsoleAppender">
    <encoder>
      <pattern>%fullRequest%n%n%fullResponse</pattern>
    </encoder>
  </appender>

  <appender-ref ref="STDOUT" />
</configuration>
Here is the output generated when accessing the logback-demo application configured as shown above:
GET /logback-demo/index.jsp HTTP/1.1 Host: localhost:8080 User-Agent: Mozilla/5.0 (Windows; U; Windows NT 5.1; en-US; rv:1.8) Gecko/20070312 Firefox/1.5.0 Accept: text/xml,application/xml,application/xhtml+xml,text/html;q=0.9,text/plain;q=0.8 Accept-Language: en-us,en;q=0.5 Accept-Encoding: gzip,deflate Accept-Charset: ISO-8859-1,utf-8;q=0.7,*;q=0.7 Keep-Alive: 300 Connection: keep-alive Referer: http://localhost:8080/logback-demo/login.jsp Cookie: JSESSIONID=15c7tqi9ehlwk; OID324nkzcmr=null; OID32862zgoa=null; HTTP/1.1 200 OK Content-Type: text/html; charset=iso-8859-1 Expires: Thu, 01 Jan 1970 00:00:00 GMT Set-Cookie: JSESSIONID=bgebt99ce9om;path=/logback-demo <html> <head> <LINK REL=StyleSheet HREF="css/pk.css" /> </head> <body> <h2>Logback demo center</h2> [snip, so that text is reasonably sized]
As mentioned previously, while extremely useful during problem
hunting, TeeFilter can introduce new problems.
Consequently, we do not recommend having TeeFilter
active in production systems. In order to avoid shipping different
code for test and production environments, TeeFilter
supports includes and excludes parameters.
TeeFilter will be active if the current host is listed
in the includes list and absent in the excludes list. By special
convention, an empty includes list is interpreted as to contain all
possible host names in the universe.
To enable TeeFilter only on the hosts named "orion"
and "gemini" and disabled elsewhere you would write:
<filter>
  <filter-name>TeeFilter</filter-name>
  <filter-class>ch.qos.logback.access.servlet.TeeFilter</filter-class>
  <init-param>
    <param-name>includes</param-name>
    <param-value>orion, gemini</param-value>
  </init-param>
</filter>
To enable TeeFilter on all hosts except
hosts named "orion" and "gemini" you would write:
<filter>
  <filter-name>TeeFilter</filter-name>
  <filter-class>ch.qos.logback.access.servlet.TeeFilter</filter-class>
  <init-param>
    <param-name>excludes</param-name>
    <param-value>orion, gemini</param-value>
  </init-param>
</filter>